Learn Adobe® Photoshop® Lightroom®
Adobe Lightroom Online Course

8 Lesson Guides | 37 Videos
self-paced online course
[?]
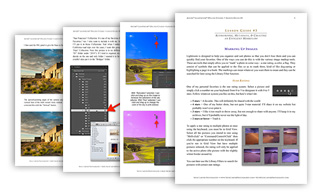
- 252 Pages of Material
- 4 ½ Hours of Video
- Unlimited Email Support
- Lifetime Course Access
- Satisfaction Guaranteed [?]
$260 Now $139
Add to Cart
"Now that I know what I can do in Lightroom, I have a feeling that I'll be much more efficient with my time in the field."
- Cheryl, course graduate | More Testimonials
Course Summary
It's no surprise that Adobe® Photoshop® Lightroom® has become the gold standard of image editing programs for photographers. It's filled to the brim with editing tools and file management features you just won't find anywhere else. But with great features comes great complication. Lightroom is so jam-packed with useful tools that it can sometimes feel like you're staring at the control console of a nuclear reactor. To get the very most out of this incredible piece of software, it's wise to get trained in all its various facets.
With this Adobe Lightroom Online Course, you'll learn how to use nearly every single feature available in this program so that you can finally unleash your full creative potential. I've left no stone unturned in this extensive course and it will surely become your go-to "operations manual" for Adobe Lightroom. Learn how to effectively organize your images using Folders and Collections so that you never lose track of your files. Discover the secrets to photo editing that will take your image correction and enhancement to heights you never thought possible. Learn how to create an efficient workflow that will speed up editing time, minimize mistakes, and maximize results.
With over 250 pages of written material and 4 ½ hours of video instruction backed up by thousands of hours teaching experience, this course will turn you into a true Lightroom power user by the time you graduate. So don't delay, get on the fast track to mastering Lightroom today!
Online Photography Course Outline

- Lesson #1: Lightroom Fundamentals, Layout, & Folders vs. Collections
- In this lesson you'll learn all the most important Lightroom fundamentals including what the 3 cardinal sins of Lightroom are and how to avoid them. You'll discover why there is no "save" button in Lightroom, what non-destructive editing is, what the Lightroom Catalog is and why it's so important, how to avoid the commonly made mistakes of new Lightroom users, how to work with multiple catalogs, how to customize Lightroom for your needs, what Modules and Panels are, how to maximize Lightroom on a small computer screen, and 11 tips for maximizing your efficiency in Lightroom.
- Discover the difference between Folders and Collections and how to organize your photos in each for best results. You'll also learn how to avoid the common mistakes I've seen from dozens of students that will turn your Lightroom catalog into an absolute mess.
- Video #1: Lightroom Fundamentals & Tips
- Video #2: Folders vs. Collections
- Lesson #2: The Library Module & Best Practices for Image Import
- Take an in-depth tour of the Library module to find out how to make the most of it. Learn how to customize this module to your liking, what the different View Modes are and how to use each, how to use Library Filters to quickly find specific photos, and how to apply basic image adjustments in bulk.
- We'll also cover how to import photos from a memory card, how (and why) to convert your RAW files to DNG, best practices for import destination, how to avoid disorganization on your hard drive, how to import RAW+JPEG files, and how to create import presets. And if you have photos already on your hard drive that you want to import, we'll look at how to do that quickly and with minimal headache. If you plan to keep your photos on an external hard drive, you'll find a ton of useful advice as we talk about how to import to an external drive, what the common mistakes are to avoid, and how to utilize Smart Previews for offline editing.
- This lesson wraps up with a full rundown of how to export photos and what all the various export options mean. We'll also cover 8-bit vs. 16-bit files, how to convert to JPEG, TIFF, or PSD, when to use each, and I'll give you my tips for some common export presets.
- Video #3: An In-Depth Tour of the Library Module
- Video #4: Importing Photos From a Memory Card
- Video #5: Importing Photos Already on Your Hard Drive
- Video #6: Using Smart Previews With an External Hard Drive
- Video #7: Exporting Photos

- Lesson #3: Keywording, Metadata, & Creating an Efficient Workflow
- From star rating to color labels to image flagging to stacking, you'll learn how to utilize all the powerful image markup tools for quick sorting and comparing. We'll unleash the true power of image keywording including the Keywording Panel, the Keyword List, how to set up keyword synonyms, how to organize your keywords into a keyword hierarchy, and how to utilize keyword suggestions and keyword sets to speed up the keywording process. We'll also cover the quick, one-click trick for finding all pictures under a certain keyword.
- Learn how to batch rename files, apply captions, copyrights, and location info to the image metadata, how to synchronize metadata and image markup across multiple photos with just a few clicks, and how to use the Painter tool for quick adjustments.
- Unleash the power of Collections with Collection Sets, Smart Collections, target collections, and Quick Collections for limitless organization opportunities. We'll also address one of the most important (and most neglected) aspects to digital photography: How to create and maintain an efficient workflow that will virtually eliminate disorganization, file misplacement, and wasted time.
- Video #8: Image Markup & Stacking
- Video #9: Image Keywording
- Video #10: Adjusting Metadata & Renaming Files in Bulk
- Video #11: Synchronizing Metadata & Image Markups
- Video #12: Creating an Efficient Workflow in Lightroom
- Video #13: Organizing Your Photos Using the Power of Collections

- Lesson #4: Image Adjustments Part 1 - Tone, Color, & Cropping
- Now we're getting into the really fun stuff - image adjustment! We'll start this lesson guide with 11 tips for making the most of the Develop module as we take a tour of this all-important section, including module customization and how to speed up your editing time.
- Learn how to use the histogram along with the highlight and shadow clipping overlays to ensure you don't over-adjust your images and lose important detail in the shadows and highlights. Then it's on to the Crop & Straighten tool as we look at some common mistakes users make when cropping photos.
- With the Basic adjustment panel, you'll learn how to perfect white balance, enhance contrast, tweak exposure, recover shadow and highlight detail, bring out intricate details using the Clarity tool, enhance colors, and discover the difference between Vibrance and Saturation and when to use each.
- Video #14: Develop Module Fundamentals & Tips
- Video #15: Getting The Most Out of the Crop & Straighten Tool
- Video #16: Working With the Basic Adjustments Panel
- Lesson #5: Image Adjustments Part 2 - Advanced Color Correction & Detail Enhancement
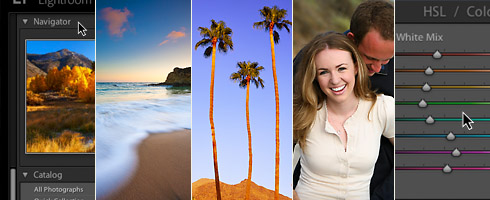
- We'll start off this lesson guide by demystifying the Tone Curve. You'll learn how to use the Tone Curve for advanced tonal adjustments so as to get maximum control over contrast, exposure, shadow detail, and highlights. Then it's on to advanced color correction using the HSL panel. Here you'll learn how to completely change the hue of any given color (care for a purple sky or green sunflowers?), how to selectively saturate certain color families, and how to completely desaturate and change the luminance of particular colors.
- Using the B&W panel, you'll learn how to create dramatic black and white photos from your color images by selectively controlling the individual color channels. This will take your B&W shots well beyond the simple "Convert to Black & White" one-click solutions.
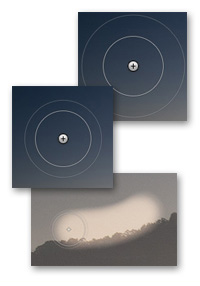
- We'll wrap up this lesson with the important topics of image sharpening and noise reduction. Never be afraid of high ISO settings again once you learn how to reduce both color noise and luminance noise, then enhance those intricate details and textures using image sharpening. You'll also learn how to apply a vignette to your image, how to create simulated film grain, how to use Split Toning, and how to turn a black and white photo into an old-timey sepia look.
- Video #17: Advanced Image Adjustment Using the Tone Curve
- Video #18: Advanced Color Adjustments with the HSL Panel
- Video #19: Creating Dramatic Black & White Conversions
- Video #20: Sharpening Your Images to Enhance Texture & Details
- Video #21: Reducing Image Noise
- Lesson #6: Image Adjustments Part 3 - Localized Enhancements With Brushes
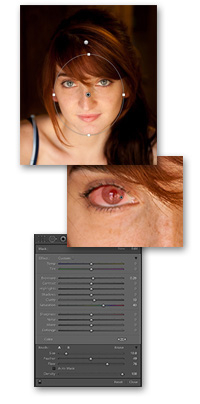
- May your images never be the same again as you learn all the incredible things you can do with Brushes! You'll learn how to dodge and burn (lighten and darken) specific areas of your photos, how to soften skin, whiten teeth, enhance eyes on your portraits, selectively saturate specific areas, and how to apply graduated filters and radial filters for some unbelievable results. Mastering this tool will unleash the floodgates of creativity in you.
- Video #22: How to Dodge & Burn Using Brushes
- Video #23: Skin Softening & Teeth Whitening With Brushes
- Video #24: Enhancing The Eyes With Iris Enhance
- Video #25: Selective Saturation With Brushes
- Video #26: Using Graduated Filters & Radial Filters
- Lesson #7: Retouching, Correcting Distortion, & Synchronizing Images
- In this lesson we'll wrap up the image adjustment tools with Spot Removal and Lens Correction. You'll learn how to quickly clean sensor dust and remove unwanted elements, thus shaving hours off your editing time. Then we'll look at how you can make your inexpensive and wide angle lenses produce far better results by correcting lens distortions, removing chromatic aberrations, and fixing distortion caused by camera angle. You'll also learn how to quickly and easily remove red-eye caused by on-camera flash.
- Now it's time to learn how to use the single biggest time-saver in Lightroom: Synchronizing image adjustments. With this feature, you'll be able to adjust one image, then copy and paste those settings to 100 other pictures...or 1,000 others...or whatever you want! This one feature alone will make you fall in love with Lightroom and never look back. We'll also cover image Presets, Snapshots, and Virtual Copies, all of which will help you make the most of the countless image adjustment combinations.
- Video #27: Cloning Out Sensor Dust & Unwanted Elements
- Video #28: Red Eye Correction
- Video #29: Correcting Lens Aberrations & Perspective Distortion
- Video #30: Copy, Paste, & Synchronize Image Edits
- Video #31: Creating Presets, Snapshots, & Virtual Copies
- Lesson #8: The Remaining Modules & Bringing It All Together for Better Photos
- In this final lesson guide, you'll learn about the remaining Lightroom modules: Map, Book, Slideshow, Print, and Web.
- You'll also learn how to merge photos into a composite panorama using Adobe Lightroom and Adobe Photoshop together. With the seamless integration of these two programs, you can create stunning high-resolution panoramic images with ease.
- To wrap up this course, I'm going to show you 5 real-life example editing sessions so you can learn how all these tools come together to enhance photos. We'll look at how to enhance a seascape, a portrait, a black and white conversion, an architectural photo, and a mountain landscape.
- Video #32: Merging a Panorama in Photoshop
- Video #33: Example Editing Session #1: Seascape
- Video #34: Example Editing Session #2: Portrait
- Video #35: Example Editing Session #3: Convert to B&W
- Video #36: Example Editing Session #4: Architectural
- Video #37: Example Editing Session #5: Mountain Landscape
Who's This Course For?
All Skill Levels
I've specifically designed this course so that even the most computer illiterate and technologically challenged user can learn how to master Adobe Lightroom. So if you consider yourself the most beginner of beginners when it comes to Lightroom, this course is for you. If you consider yourself an intermediate Lightroom user - you know the basics (or better), but you want to take it to the next level - then this course is also for you. Although this course will speak to the newbies, that doesn't mean it's basic. This course will take users of any skill to the next level without leaving the absolute beginners behind.
If you are interested in any of the following, then this course is for you:
- Speed up your workflow
- Speed up editing time
- Improve overall image quality
- Improve image organization
- Learn effective file management
- Avoid costly mistakes
- Maximize efficiency in Lightroom
- Make professional-quality image enhancements
- Learn Lightroom from the ground up, covering every last facet, regardless of current skill level
If you already consider yourself an advanced Lightroom power-user, then this course may be mostly review for you. If you have only done piecemeal lessons on Adobe Lightroom (e.g. through YouTube, blog posts, a book here and there) then this course will help connect the dots and fill in the gaps in your knowledge.
If you’re still unsure whether this course is right for you, email me at .
Requirements
- Adobe Lightroom - version 5 or newer is recommended, but any version will work for this course
- Retail version or Creative Cloud are both okay
- Mac or PC doesn't matter, both are addressed in the course
What's Included
This online photography course is composed of:
- 8 lesson guides
- 252 pages in all
- 662 example images & screenshots
- 8 assignments
- 37 video presentations
- Unlimited email support from Nick Carver
- Assignment feedback and critiques
- Lifetime course access
This is a "work at your own pace" course, which means you can take the course at whatever pace works for your schedule. All lesson guides and videos will be available to you from day 1. Study as fast or slow as you wish and complete assignments whenever you’re ready. To learn more about how the course works, visit this information page.
Throughout the course, you will have unlimited email support with a direct address to Nick Carver. Emails are typically answered within 2 business days depending on my volume of emails. Phone and/or online chat support is also available for an additional charge. Drop me a line for rates at .
8 Lesson Guides | 37 Videos
self-paced online course
[?]
- 252 Pages of Material
- 4 ½ Hours of Video
- Unlimited Email Support
- Lifetime Course Access
- Satisfaction Guaranteed [?]
$260 Now $139
Add to Cart